Flexible Mold Instructions


___________________________________________
Polymer Clay Instructions
•
Do not leave uncured clay in the mold.
•
Release Agents: Test the material that you will be using in the mold by molding a part. If a release agent is needed,
•
you may need to dust the openings with baby powder (or corn starch) or lightly mist with water depending on which
•
is best for your molding material. If you are using PMC or other metal clay, a light coating of olive oil or other
•
cooking oil may be necessary.
•
To remove tiny parts: roll a small piece of clay with a cone shape on one end. Gently flex the mold in several
•
directions. Touch the cone point to the molded part to lift out.
•
It is very important to condition the clay according to the manufacturers instructions before you begin your project.
•
After conditioning the clay, mix colors needed for the project.
1.
Roll a ball of clay.
2.
Add or subtract clay from the ball accordingly.
3.
Gently squeeze the ball of clay into a shape similar to the opening in the mold cavity.
4.
Press clay into the deepest part of the mold and out from the center to the edges.
5.
If you over fill a mold, carefully trim the excess with a flat blade knife or a clay knife or scraper held parallel to the
mold.
6.
Before demolding the finished part, clean the edges by pushing clay around the edges back into the mold with your
fingertips.
7.
To demold, gently flex mold in several directions, loosening the clay, then flex more fully, lifting or tipping the clay
from the mold.
8.
Place molded clay on a baking surface. Bake following directions on the clay package.
_____________________________________________
Plaster Instructions
•
When using plaster, you will need a soapy release agent.
•
Follow the manufacturers instructions for mixing, pouring and de-airing the plaster.
•
Allow the plaster to cure (dry) completely to be sure that the small or tiny parts are very strong. Flex the mold gently
•
in several directions to loosen the cured part.
_____________________________________________
Paper Clay
How to use: Use all clays the same way:
1.
Remove from package - Knead just a little to warm clay.
2.
Roll clay into the size ball need as indicated on the mold instruction sheet and press into the mold opening. I always
3.
start in the center of the mold and push to edges.
4.
Next, I take my clay rolling pin and roll over the back of the mold - allowing me to cut away extra clay if needed.
5.
Turn the mold over and remove clay piece - set aside to dry - drying time is different for each piece. Some may
6.
take up to a full day.
7.
If the bottom of mold is not completely flat or you needed it to be flatter - After drying, paper clay can be sanded.
8.
Paper Clay can be painted with many different mediums: Twinkling H2O's,
Acrylic paints, Rub-ons inks,
9.
Prime Elements, Glaze, Ink Pad Inks, Pearl Ex and Anything that can be used to paint on paper.
Additional Hints
•
You can paint on Paper Clay while it's still wet
•
You can push eyelets, brads, or make holes in the clay while it's still wet
•
You can stamp into paper clay while wet and you will get the impression
•
You can stamp a word or image onto dry clay
•
Another way to add color to your clay. Start with white clay and add a small amount of acrylic paint and mix well.
_____________________________________________
Ultra Thick Embossing Enamel
1.
Melt UTEE in Melting Pot by Ranger T. The Melting Pot should be set at highest setting. The pot has a UTEE
2.
setting. After pouring UTEE in Melting Pot put the lid back on the Melting Pot and wait for all of your UTEE to melt.
3.
Always mix (using Melting Pot tools) UTEE before pouring into mold. Make sure all of the material is melted.
4.
SAFETY FIRST: UTEE is VERY Hot. I place my molds onto a non-stick craft sheet, then carefully pick up Melting
5.
Pot by it's handles. THE POT IS ALSO VERY HOT. Slowly pour into mold; do not over fill the mold.
6.
Let the mold sit for about 10 minutes. Make sure it is completely cool before you demold. To test UTEE tap a fork
7.
lightly on top of mold piece.
8.
When the UTEE is set up, turn the mold over to release the molded part. One of the best things about UTEE is that
9.
if you are not happy with the piece, put it back into Melting Pot to re-melt and remold.
Additional Hints:
•
Clear UTEE will turn an amber color the longer it sits in the Melting Pot.
•
If there is left over UTEE still in melting pot - I pour UTEE into as many molds as I can fill (not just the ones I need
•
for project).
•
When UTEE is set up, I place any un-needed or imperfect molded pieces back into UTEE container to use next
•
time. Remember it can be melted over and over. NO waste.
After piece is set up you can add additional color by using rub-ons, inks, Prime Elements, Etc..
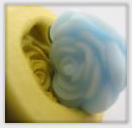
Making Party Mints!
(Or Chocolates, Soap, Wax, Lip balm or Solid Perfume)
When planning a party, many people enjoy both making and eating these melt in your mouth cream cheese sugary party mints. You
know the ones that are made in all kinds of shapes and colors depending on the events theme. Everyone seems to love them, but
finding the right mold for the occasion is often difficult, but we can help. Especially great for Showers, Weddings, Anniversaries,
Graduations & Birthdays!
Our very own Mad About Molds Experiment: We have been asked repeatedly about using our molds for Party Mints, and could
never answer with complete certainty without trying it ourselves. Since no one here has any knowledge in making Party Mints, we
asked a very experienced mint maker try out our flexible molds to see how it works using our molds, and we were very pleased with
the results. Here's her tips after experimenting with our molds to mints.
Instructions for making Party Mints! (Recipe Below)
You can use both the hard or flexible molds, however I found that the flexible molds took less time and were easier to work with.
The hard molds will work, but you need to tap to get the mold out. Both types of molds made great impressions and the results
were nice.
I made the mints with cream cheese and powdered sugar like I've done for years. Before I press the mint ball into the mold, I roll
them in regular cane sugar then press. This technique worked great with the molds.
I refrigerated the mints for a couple of hours before making them, then I put them on cookie sheets and freeze to put in containers.
If particles of mint got in the groves I just took a dried paper towel and wiped out.
Additional Tips:
1.
Molds can also be cleaned with mild soap and water and a soft brush.
See our safety tips about working with molds & food here.
----------------------------------------------------------------------------------------
IMPORTANT Ordering Instructions: (for Mint Molds)
1. Molds with smooth edges keep the mold from falling apart, so if your shape has a jagged edge you will want to be sure
to add the "Cavity Border" to your order to get a smooth edge and a deeper imprint. (see the diagram.)
2. If you do not want to add this round or oval cavity border go ahead and order any flexible or hard mold that you wish
from the flexible molds page.
3. Please check the size of the mold imprint in the description of the mold, if you are adding a cavity border to your mold.
Doing so will increase the size of your mold dramatically, especially with designs that have a deep imprint.
Mad About Molds
Flexible Mold Instructions for...
•
Polymer Clay
•
Plaster
•
Paper Clay
•
Ultra Thick Embossing Enamel
•
Party Mints
Cream Cheese Mints
Total Time: 48 hrs 20 mins
Prep Time: 20 mins
Cook Time: 48 hrs
Ingredients:
•
1 (8 ounce) package cream cheese
•
1 (2 lb) package powdered sugar
•
10 -11 drops peppermint extract (scant 1/4 tsp)
•
food coloring (optional)
•
granulated sugar (for rolling)
Directions:
1.
Mixture will be dry.
2.
Mix ingredients in a bowl (best if use dough hooks on your mixer).
3.
Remove from bowl and knead.
4.
You may add food coloring if you desire.
5.
Roll in small balls and then roll the balls in granulated sugar.
6.
Press into molds or slightly flatten balls.
7.
Remove from mold.
8.
Lay on wax paper to dry at least overnight.
9.
Turn over and dry on other side.
10.
Usually dry 24 hrs on each side.
11. If keeping longer than a couple of weeks, they need to be frozen.


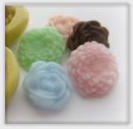
Get creative by layering your mints.
Samples...


zoom


Flexible Mold Instructions


___________________________________________
Polymer Clay Instructions
•
Do not leave uncured clay in the mold.
•
Release Agents: Test the material that you will be using in the
mold by molding a part. If a release agent is needed,
•
you may need to dust the openings with baby powder (or corn
starch) or lightly mist with water depending on which
•
is best for your molding material. If you are using PMC or other
metal clay, a light coating of olive oil or other
•
cooking oil may be necessary.
•
To remove tiny parts: roll a small piece of clay with a cone shape
on one end. Gently flex the mold in several
•
directions. Touch the cone point to the molded part to lift out.
•
It is very important to condition the clay according to the
manufacturers instructions before you begin your project.
•
After conditioning the clay, mix colors needed for the project.
1.
Roll a ball of clay.
2.
Add or subtract clay from the ball accordingly.
3.
Gently squeeze the ball of clay into a shape similar to the opening
in the mold cavity.
4.
Press clay into the deepest part of the mold and out from the
center to the edges.
5.
If you over fill a mold, carefully trim the excess with a flat blade
knife or a clay knife or scraper held parallel to the
mold.
6.
Before demolding the finished part, clean the edges by pushing
clay around the edges back into the mold with your
fingertips.
7.
To demold, gently flex mold in several directions, loosening the
clay, then flex more fully, lifting or tipping the clay
from the mold.
8.
Place molded clay on a baking surface. Bake following directions
on the clay package.
_____________________________________________
Plaster Instructions
•
When using plaster, you will need a soapy release agent.
•
Follow the manufacturers instructions for mixing, pouring and de-
airing the plaster.
•
Allow the plaster to cure (dry) completely to be sure that the small
or tiny parts are very strong. Flex the mold gently
•
in several directions to loosen the cured part.
_____________________________________________
Paper Clay
How to use: Use all clays the same way:
1.
Remove from package - Knead just a little to warm clay.
2.
Roll clay into the size ball need as indicated on the mold
instruction sheet and press into the mold opening. I always
3.
start in the center of the mold and push to edges.
4.
Next, I take my clay rolling pin and roll over the back of the
mold - allowing me to cut away extra clay if needed.
5.
Turn the mold over and remove clay piece - set aside to dry
- drying time is different for each piece. Some may
6.
take up to a full day.
7.
If the bottom of mold is not completely flat or you needed it
to be flatter - After drying, paper clay can be sanded.
8.
Paper Clay can be painted with many different mediums:
Twinkling H2O's,
Acrylic paints, Rub-ons inks,
9.
Prime Elements, Glaze, Ink Pad Inks, Pearl Ex and
Anything that can be used to paint on paper.
Additional Hints
•
You can paint on Paper Clay while it's still wet
•
You can push eyelets, brads, or make holes in the clay while it's
still wet
•
You can stamp into paper clay while wet and you will get the
impression
•
You can stamp a word or image onto dry clay
•
Another way to add color to your clay. Start with white clay and
add a small amount of acrylic paint and mix well.
_____________________________________________
Ultra Thick Embossing Enamel
1.
Melt UTEE in Melting Pot by Ranger T. The Melting Pot should be
set at highest setting. The pot has a UTEE
2.
setting. After pouring UTEE in Melting Pot put the lid back on the
Melting Pot and wait for all of your UTEE to melt.
3.
Always mix (using Melting Pot tools) UTEE before pouring into
mold. Make sure all of the material is melted.
4.
SAFETY FIRST: UTEE is VERY Hot. I place my molds onto a
non-stick craft sheet, then carefully pick up Melting
5.
Pot by it's handles. THE POT IS ALSO VERY HOT. Slowly pour
into mold; do not over fill the mold.
6.
Let the mold sit for about 10 minutes. Make sure it is completely
cool before you demold. To test UTEE tap a fork
7.
lightly on top of mold piece.
8.
When the UTEE is set up, turn the mold over to release the
molded part. One of the best things about UTEE is that
9.
if you are not happy with the piece, put it back into Melting Pot to
re-melt and remold.
Additional Hints:
•
Clear UTEE will turn an amber color the longer it sits in the
Melting Pot.
•
If there is left over UTEE still in melting pot - I pour UTEE into as
many molds as I can fill (not just the ones I need
•
for project).
•
When UTEE is set up, I place any un-needed or imperfect molded
pieces back into UTEE container to use next
•
time. Remember it can be melted over and over. NO waste.
After piece is set up you can add additional color by using rub-ons,
inks, Prime Elements, Etc..
Making Party Mints!
(Or Chocolates, Soap, Wax, Lip balm or Solid Perfume)
When planning a party, many people enjoy both making and eating
these melt in your mouth cream cheese sugary party mints. You
know the ones that are made in all kinds of shapes and colors
depending on the events theme. Everyone seems to love them, but
finding the right mold for the occasion is often difficult, but we can
help. Especially great for Showers, Weddings, Anniversaries,
Graduations & Birthdays!
Our very own Mad About Molds Experiment: We have been asked
repeatedly about using our molds for Party Mints, and could
never answer with complete certainty without trying it ourselves. Since
no one here has any knowledge in making Party Mints, we
asked a very experienced mint maker try out our flexible molds to see
how it works using our molds, and we were very pleased with
the results. Here's her tips after experimenting with our molds to
mints.
Instructions for making Party Mints! (Recipe
Below)
You can use both the hard or flexible molds, however I found that the
flexible molds took less time and were easier to work with.
The hard molds will work, but you need to tap to get the mold out.
Both types of molds made great impressions and the results
were nice.
I made the mints with cream cheese and powdered sugar like I've
done for years. Before I press the mint ball into the mold, I roll
them in regular cane sugar then press. This technique worked great
with the molds.
I refrigerated the mints for a couple of hours before making them,
then I put them on cookie sheets and freeze to put in containers.
If particles of mint got in the groves I just took a dried paper towel and
wiped out.
Additional Tips:
1.
Molds can also be cleaned with mild soap and water and
a soft brush.
See our safety tips about working with molds & food here.
----------------------------------------------------------------------------------------
IMPORTANT Ordering Instructions: (for Mint
Molds)
1. Molds with smooth edges keep the mold from falling apart, so if your
shape has a jagged edge you will want to be sure
to add the "Cavity Border" to your order to get a smooth edge and a deeper
imprint. (see the diagram.)
2. If you do not want to add this round or oval cavity border go ahead and
order any flexible or hard mold that you wish
from the flexible molds page.
3. Please check the size of the mold imprint in the description of the mold,
if you are adding a cavity border to your mold.
Doing so will increase the size of your mold dramatically, especially with
designs that have a deep imprint.


- Home
- About us
- Art clay projects pmc
- Basic instructions
- Cameos and molds
- Contact us
- Castings materials and instructions
- Casting recipes
- Chat
- Custom molds
- Creative ways to use molds
- Flexible mold instructions
- Gallery to inspire
- Payment and shipping
- Safety precautions
- Search and site map
- Testimonials
- Troubleshooting
- Video
Mad About Molds
Flexible Mold Instructions for...
•
Polymer Clay
•
Plaster
•
Paper Clay
•
Ultra Thick Embossing Enamel
•
Party Mints
Cream Cheese Mints
Total Time: 48 hrs 20 mins
Prep Time: 20 mins
Cook Time: 48 hrs
Ingredients:
•
1 (8 ounce) package cream cheese
•
1 (2 lb) package powdered sugar
•
10 -11 drops peppermint extract (scant 1/4 tsp)
•
food coloring (optional)
•
granulated sugar (for rolling)
Directions:
1.
Mixture will be dry.
2.
Mix ingredients in a bowl (best if use dough hooks on your mixer).
3.
Remove from bowl and knead.
4.
You may add food coloring if you desire.
5.
Roll in small balls and then roll the balls in granulated sugar.
6.
Press into molds or slightly flatten balls.
7.
Remove from mold.
8.
Lay on wax paper to dry at least overnight.
9.
Turn over and dry on other side.
10.
Usually dry 24 hrs on each side.
11. If keeping longer than a couple of weeks, they need to be frozen.

Get creative by layering your mints.
Samples...
zoom